Youtube视频经常出现有画无声的解决方案
Youtube视频经常出现有画无声的解决方案
- 先是怀疑多音轨未自动识别(播放),TV端经常遇到,以为是TV解码不全或无法识别多音轨或同时播放。怀疑有隐藏音轨(DASH分离流、DRM加密等),这种情况似乎只能通过OBS或Audacity等录屏录音软件来解决;
- 然后发现PC网页端也有部分片断无法播放(芒果浪姐的部分舞台),于是排除了1,那就是这个节目从源头上就缺失了部分音频,只能通过其它源头来补足其缺失。
先处理情况1:
查看全部音轨编号
1 | ffprobe -v error -show_streams -select_streams a "视频.mp4" |
1.
ffprobeFFprobe 是 FFmpeg 工具套件的一部分,专门用于探测和分析多媒体文件,而不是处理或转换它们。
2.
-v error
- 作用:设置日志输出级别为
error(错误)。In the flag-v error, thevstands for "verbosity" (or log level). It controls how much chatter, status updates, and diagnostic information FFmpeg/FFprobe outputs to your terminal window when you run a command.- 含义:只显示错误信息,不显示警告、信息或调试信息。
- 效果:让输出结果非常干净,只包含你请求的数据,没有多余的日志干扰。
3.
-show_streams
- 作用:显示所有流(stream)的详细信息。
- 输出内容:包括编码器、时长、比特率、采样率、声道数、语言标签等完整元数据。
4.
-select_streams a
- 作用:筛选流,只选择音频流。
- 参数解释:
a代表 audio(音频流)- 如果想选择视频流,用
v(video)- 如果想选择字幕流,用
s(subtitle)- 效果:只显示音频流的信息,忽略视频流、字幕流等。
5.
"视频.mp4"
- 要分析的目标文件路径。

关键信息解读
从输出中,你可以获取以下重要信息:
字段 示例值 含义 codec_nameaac音频编码格式 sample_rate44100采样率(Hz) channels2声道数 channel_layoutstereo声道布局(立体声) duration60.000000音频时长(秒) bit_rate128000比特率(bps) TAG:languageund语言标签( und=未定义)
切换默认音轨(直接选用舞台有声轨)
假设:视频流 0:0,解说轨 0:1(无声舞台),舞台音轨 0:2(正常有声),执行:
1 | ffmpeg -i "视频.mp4" -map 0:v -map 0:2 -c copy "修复_单舞台音轨.mp4" |
-map 0:v:保留原画面-map 0:2:单独选用第 2 条音轨-c copy:无损流复制,速度极快
Command Breakdown
ffmpegInvokes the FFmpeg program.
-i "视频.mp4"Specifies the input file (in this case,"视频.mp4"). The-iflag stands for "input."
-map 0:vThis tells FFmpeg to select the video stream from the first input file (FFmpeg starts counting inputs at0). The:vacts as a wildcard for "all video tracks" or "the primary video track."
-map 0:2This tells FFmpeg to specifically select the third stream from the first input file.⚠️ Note on Stream Indexing: FFmpeg counts streams starting from
0. Usually,0:0is video,0:1is the first audio track, and0:2would be the second audio track (or third stream total, which could also be a subtitle track depending on how the file was made). By explicitly mapping0:2, you are intentionally isolating this specific track.
-c copyThis is short for-codec copy. It tells FFmpeg to stream-copy the mapped video and audio tracks directly into the output file. Because it doesn't decode and re-encode the data, it saves 100% of the original quality and finishes in seconds.
"修复_单舞台音轨.mp4"The name of your new output file.Visually Understanding Stream Mapping
To see why the
-mapflags are necessary, imagine your input file as a bundle of multiple parallel tracks. The command acts like a filter:
2
3
4
├── Stream 0:0 (Video) ─────── [-map 0:v] ───────► Output File
├── Stream 0:1 (Audio 1) (Contains only Video
└── Stream 0:2 (Audio 2) ─────── [-map 0:2] ───────► and Audio 2)If you didn't use the
-mapflags, FFmpeg's default behavior would kick in, which only grabs the first video track and the first audio track (0:1), completely ignoring the stage audio track you are trying to isolate.
混合多条音轨(解说 + 舞台声音都保留)
如果两条音轨都需要(不想丢解说),混合双音轨为立体声:
1 | ffmpeg -i "视频.mp4" -filter_complex "[0:1][0:2]amix=inputs=2:duration=shortest" -map 0:v -c:v copy "修复_混合双音轨.mp4" |
What if you wrote
-map 0:a:1instead?If you wanted to use the "audio" label explicitly, the precise syntax would be
-map 0:a:1(which means: "Look at input 0, find the audio tracks, and give me the second one", since audio tracks are also counted starting from 0).In your specific command:
-map 0:2means: "Give me the 3rd stream overall, whatever it is." (In this file, it happens to be your stage audio).
To mix all the audio tracks together into a single track, you actually have to change your approach.
Up until now, we have been using -c copy to copy the tracks exactly as they are. But you cannot mix audio without re-encoding it, because FFmpeg has to unpack the audio math, blend the waveforms together, and compress them back down.
To achieve this, we will use an FFmpeg filter called amerge. Here is the command to do it:
1 | ffmpeg -i "视频.mp4" -filter_complex "[0:a]amerge=inputs=2[aout]" -map 0:v -map "[aout]" -c:v copy -c:a aac "修复_混合音轨.mp4" |
How this command works:
-filter_complex "[0:a]amerge=inputs=2[aout]"This is the magic ingredient.[0:a]tells FFmpeg to grab all audio streams from the first input.amerge=inputs=2tells it to take those 2 audio streams and merge them into a single multi-channel audio layout.[aout]is just a temporary nickname we give to this new, mixed audio track so we can reference it later in the command.
-map 0:vCopies the original video track, exactly like before.-map "[aout]"Tells FFmpeg to put our newly mixed audio track into the final output file.-c:v copyEnsures the video is still copied instantly without losing any quality.-c:a aacBecause we are blending the audio waveforms together, we can't usecopyfor the audio. This tells FFmpeg to encode the new combined audio track into standard AAC format.
⚠️ A quick warning about "Stereo" vs "Surround"
The amerge filter takes the audio channels and stacks them. For example, if Audio Track 1 is Stereo (Left/Right) and Audio Track 2 is Stereo (Left/Right), amerge will create a 4-channel audio track.
If you play the video later on a standard phone or laptop, you might only hear the first two channels. If you want to make sure they are mixed down into a standard, universally compatible 2-channel Stereo track where everything is blended together perfectly, use amix instead:
1 | ffmpeg -i "视频.mp4" -filter_complex "[0:a]amix=inputs=2:duration=first[aout]" -map 0:v -map "[aout]" -c:v copy -c:a aac "修复_标准双声道混合.mp4" |
(The duration=first part ensures the video doesn't keep running on a black screen if one audio track happens to be slightly longer than the other).
场景 B:单条多声道(5.1 环绕),播放时部分声道静音
YouTube 部分舞台视频是 5.1 环绕,普通播放器 / 下载工具只解析前置声道,后置 / 环绕声道无声。
把 5.1 强制转立体声,全声道混音输出:
1 | ffmpeg -i "视频.mp4" -c:v copy -c:a aac -ac 2 "修复_5.1转立体声.mp4" |
-ac 2:强制转为双声道立体声,所有声道声音合并,舞台部分恢复出声。
彻底解决 → 重新完整下载(根治,推荐)
snaptube/datatool 这类工具默认只抓取第一条音轨 + 简化声道,是根源。改用支持全音轨、全声道、无损下载的方案。
首选:yt-dlp(开源最强 YouTube 下载工具,完美支持多音轨 / 杜比 / 环绕声)
1. 基础安装(Windows)
1. 下载 yt-dlp 独立 exe,和 ffmpeg 放在同一文件夹
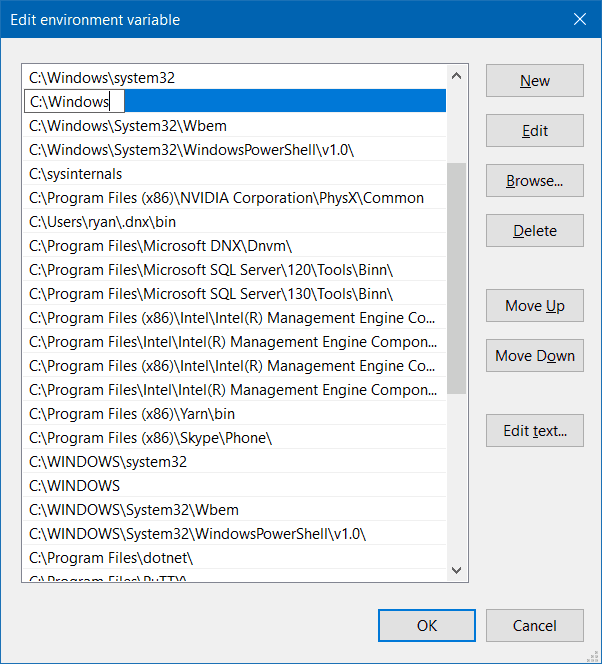
- 确保系统环境变量能调用
yt-dlp和ffmpeg
2. 完整参数下载(保留所有音轨 + 原生声道,不自动转码)
1 | yt-dlp -f bestvideo+bestaudio --merge-output-format mp4 "YouTube链接" |
参数说明:
bestvideo+bestaudio:分别下载最高画质视频 + 最高音质音频(包含所有原生音轨 / 声道)- 不做二次转码,完整保留 YouTube 原始封装,舞台音轨不会丢失
3. 强制下载全部音轨(针对多语言 / 多内容轨)
1 | yt-dlp --audio-multistreams -f bestvideo+bestaudio --merge-output-format mp4 "链接" |
--audio-multistreams:强制保留所有独立音频流,不再自动丢弃多余音轨,彻底解决舞台音轨丢失。
4. 针对杜比 / 5.1 环绕声专属下载
1 | yt-dlp -f "bv*+ba[acodec^=opus]" --merge-output-format mp4 "链接" |
优先抓取原生 OPUS 多声道音轨,兼容舞台环绕声。
5.自动下载所有音轨 + 自动合并
1 | yt-dlp --all-audio -f bestvideo+bestaudio "你的YouTube链接" |
6. 如果你想【手动选择音轨】下载(更精准)
1 | yt-dlp -F "YouTube链接" |
会列出所有音轨:
1 | 139 m4a audio only 48k |
然后下载你要的音轨:
1 | yt-dlp -f 最佳视频ID+251 "链接" |
7. 只下载YT播放的流
1 | streamlink URL best -O | ffmpeg -i - output.mp4 |
但这个方法有个问题,就是尽管已经加了best,却仍只能下载到最低质量的音视频流,因为YT所有的高质量流全都是DASH,而streamlink命令只寻找HLS流。所以,想得到高质量的音视频,只能采用yt-dlp命令。
8. 带cookie下载
1 | yt-dlp --cookies-from-browser chrome "https://www.youtube.com/watch?v=xxxx" |
1 | yt-dlp --cookies cookies.txt "https://www.youtube.com/watch?v=-7GWnxu_2Vo" |
最后发现芒果台上传的源就有部分的声音缺失,视频都是完整的,那为方便起见,直接去找缺失声音的部分,然后补回来吧。
先从YT上下载到缺失声音的部分(多为舞台纯享版,直接下来音频即可)
将原文件音频从文件中分离出来
1 | ffmpeg -i input.mp4 -vn -acodec copy output.m4a |
转mp3
1 | ffmpeg -i input.mp4 -vn -q:a 0 output.mp3 |
转wav
1 | ffmpeg -i input.mp4 -vn output.wav |
只提取某一段
1 | ffmpeg -i input.mp4 -ss 00:10:00 -to 00:15:00 -vn -acodec copy output.m4a |
用Audacity先导入原文件音频,再依次导入需要修补的各个音频片段,用波形对照法添加到下方音轨,最后导出完整音频,再与原视频合并(取代原文件中的音频)。
1 | ffmpeg -i "视频.mp4" -i "new_audio.mp3" -map 0:v -map 1:a -c:v copy -c:a aac -shortest "输出_更换音轨.mp4" |
Command Breakdown
-i "视频.mp4"This is your first input file, which FFmpeg labels internally as index0.-i "new_audio.mp3"This is your second input file, which FFmpeg labels internally as index1.-map 0:vTells FFmpeg to grab the video track (:v) from the first input (0).-map 1:aTells FFmpeg to grab the audio track (:a) from the second input (1). Because you completely left out a map for0:a, the video's original audio track is stripped away.-c:v copyStream-copies the video track directly. There is zero re-encoding, so the video quality remains perfectly identical and saves your computer's CPU power.-c:a aacEncodes your new audio track into standard high-quality AAC format to make sure it plays nicely inside an MP4 container. (If your input audio is already an.m4aor.aacfile, you can change this to-c:a copy).-shortestThis is a critical helper flag. If your new audio track is longer than the video (or vice versa), this flag tells FFmpeg to stop recording the moment the shortest file ends. This prevents your video from getting stuck on a frozen black screen at the end while the music keeps playing.What if I want to keep a little bit of the original audio too?
If you don't want to completely erase the original audio, but instead want to mix the new music over the top of the background audio, you would use an
amixfilter complex like this:
如何判断静音时段在哪呢?
还是使用Audacity,导入音频,放大到适当程度后查看波形的空白处就行了!

 Wechat
- Alipay
- Paypal